Alipes
Single Property WordPress Theme
Created : 24/02/2023By : Layerdrops
Support : Ticksy Forum
Thank you for purchasing Alipes - Single Property WordPress Theme . If you have
any
questions that are beyond the scope of this help file, please feel free to email, via my user
page contact form or put a ticket at Support Center .
Thankyou so much!
Theme Features
- Easy Installation and Setup with demo content Import
- Live Customizer options.
- Two Homepages Layout
- Fully Responsive Design
- Unlimited Color Options with Backend Color Picker for any kind of gorgeous color settings.
- SEO Optimized: our Code is built with SEO best practice in mind.
- Extensive Documentation
Get Started
First, thank you for purchasing our theme!
This guide provides instructions for installation, help on getting started and extensive documentation of features. It is recommended you read it thoroughly to fully leverage the Ostion theme's capabilities. Please also make sure to check out our Video Tutorials as they explain everything covered in here in greater depth. We hope you enjoy building with Ostion as much as we enjoyed developing it and continue to develop with new features!
WordPress Installation
Before beginning the installation and configuring of your new theme, you must first have
WordPress already installed on a server.
If you are struggling, here is a very detailed guide at WordPress Codex that will walk you
through every step.
If you prefer something more visual, you can watch this video tutorial on how to install
Wordpress by us
(Please note the video shown is third party video, but the same process applies)
Theme Installation
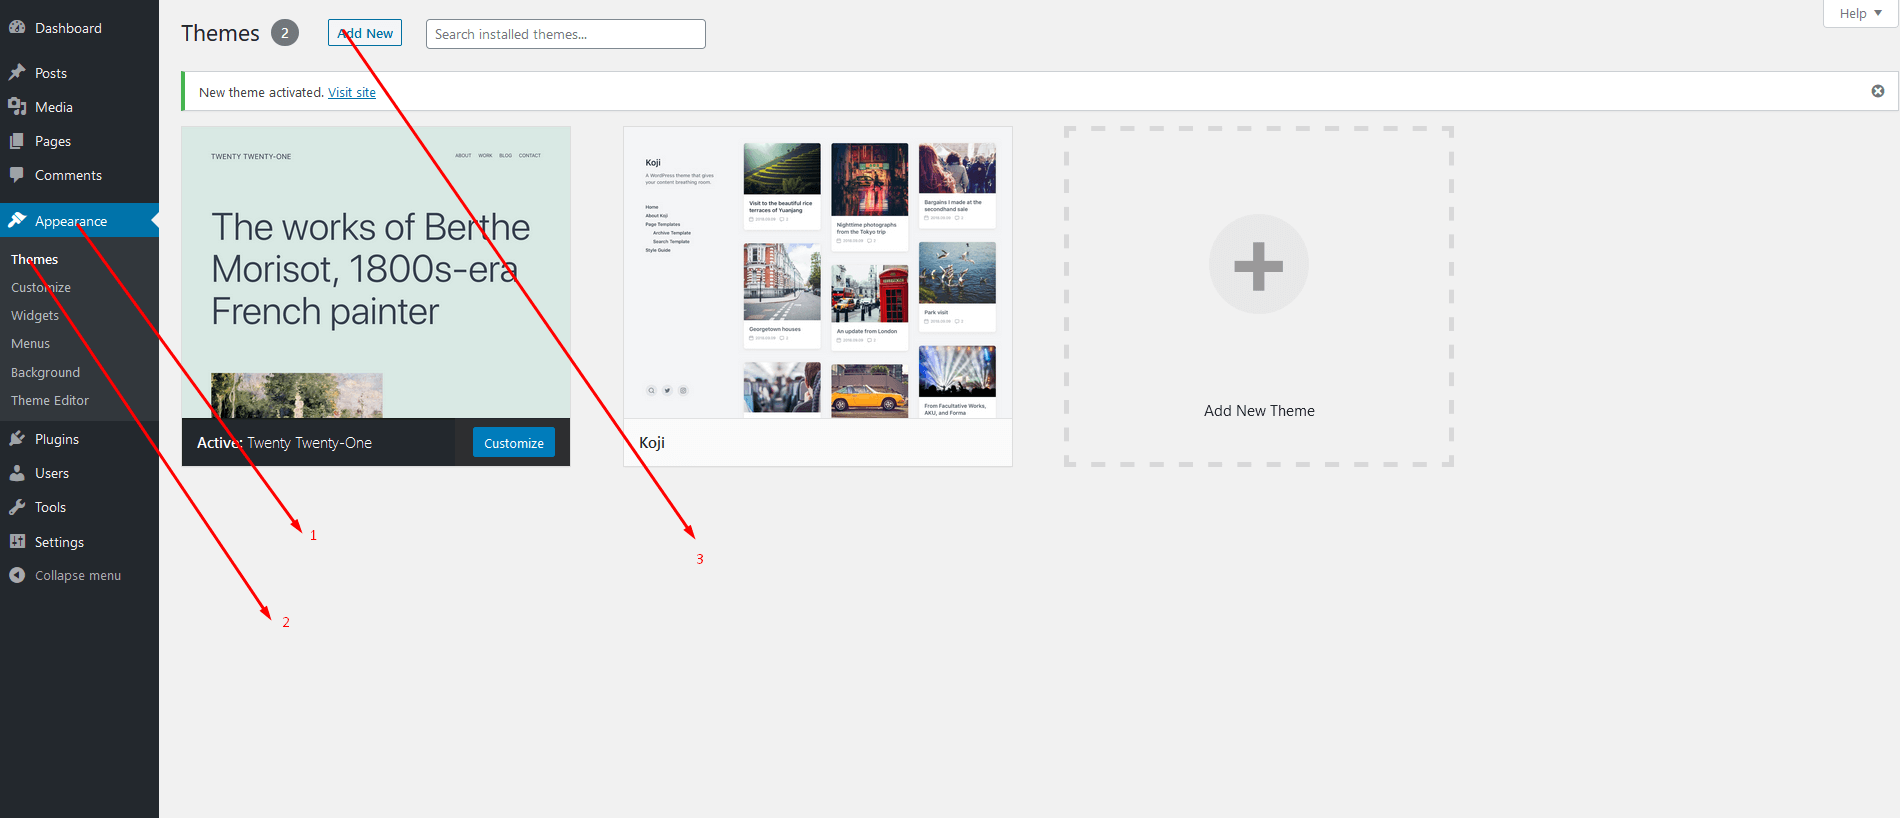
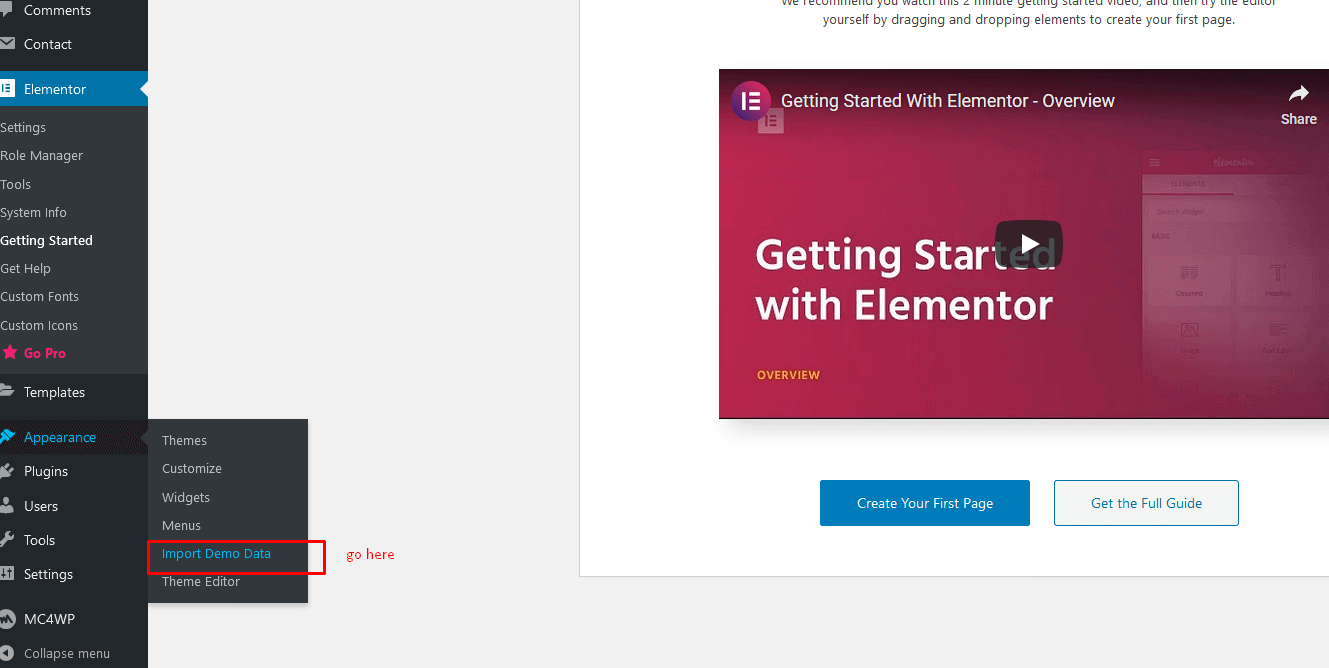
Go to Dashboard>Appearance>Themes> Add New
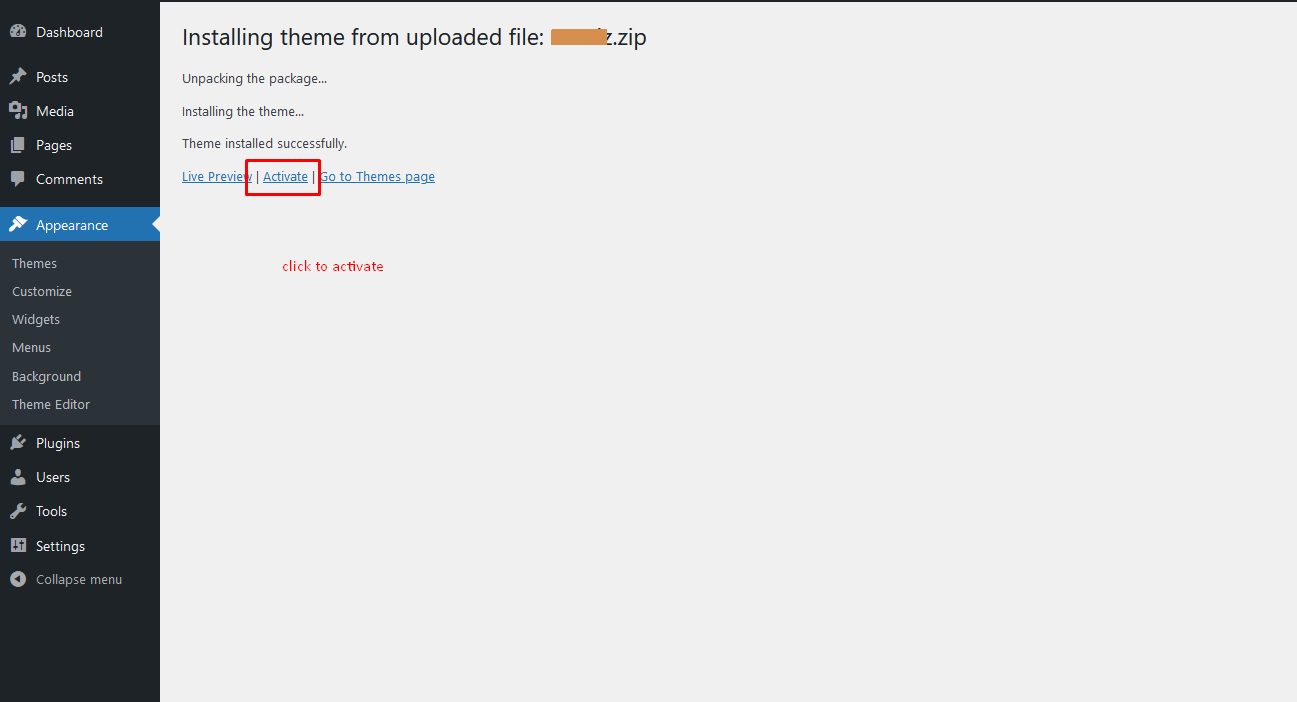
after that click to upload theme and select downloaded Alipes.zip wordpress theme and click to install now.
after that activate theme.

Plugin Installation
after activating theme you will get notice about installing required plugins.
go to that page and install and activate all required plugins.

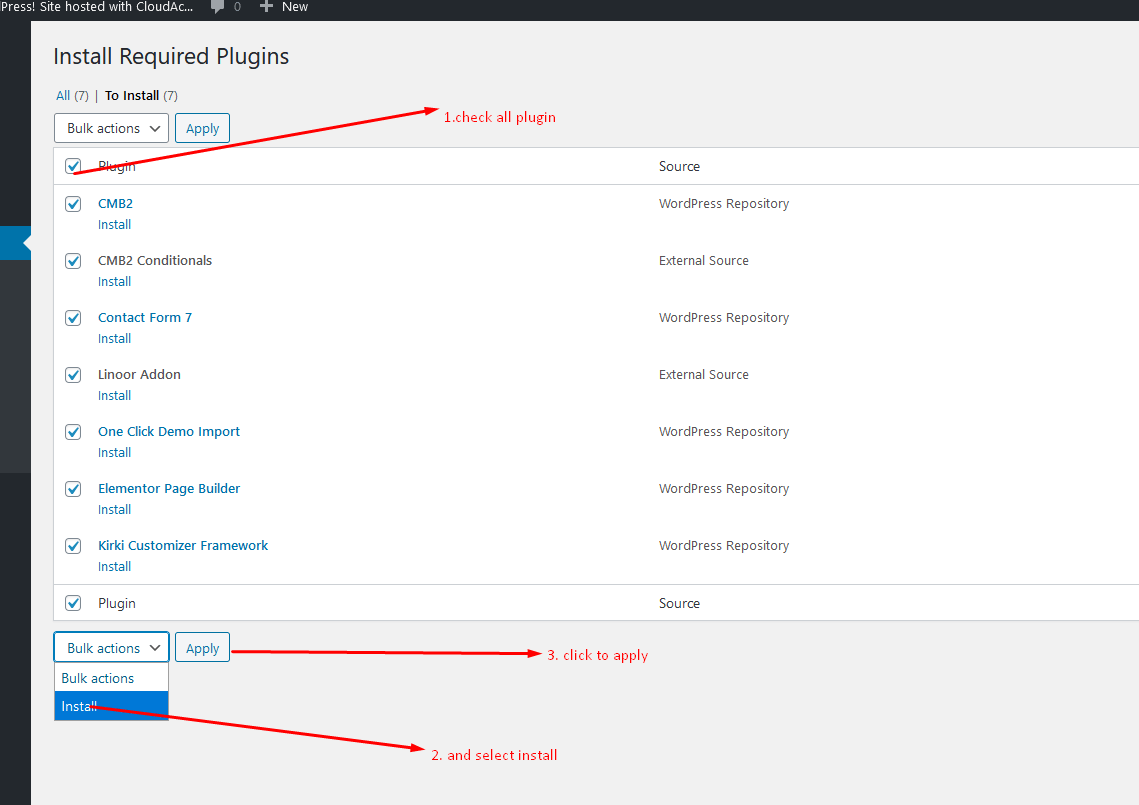
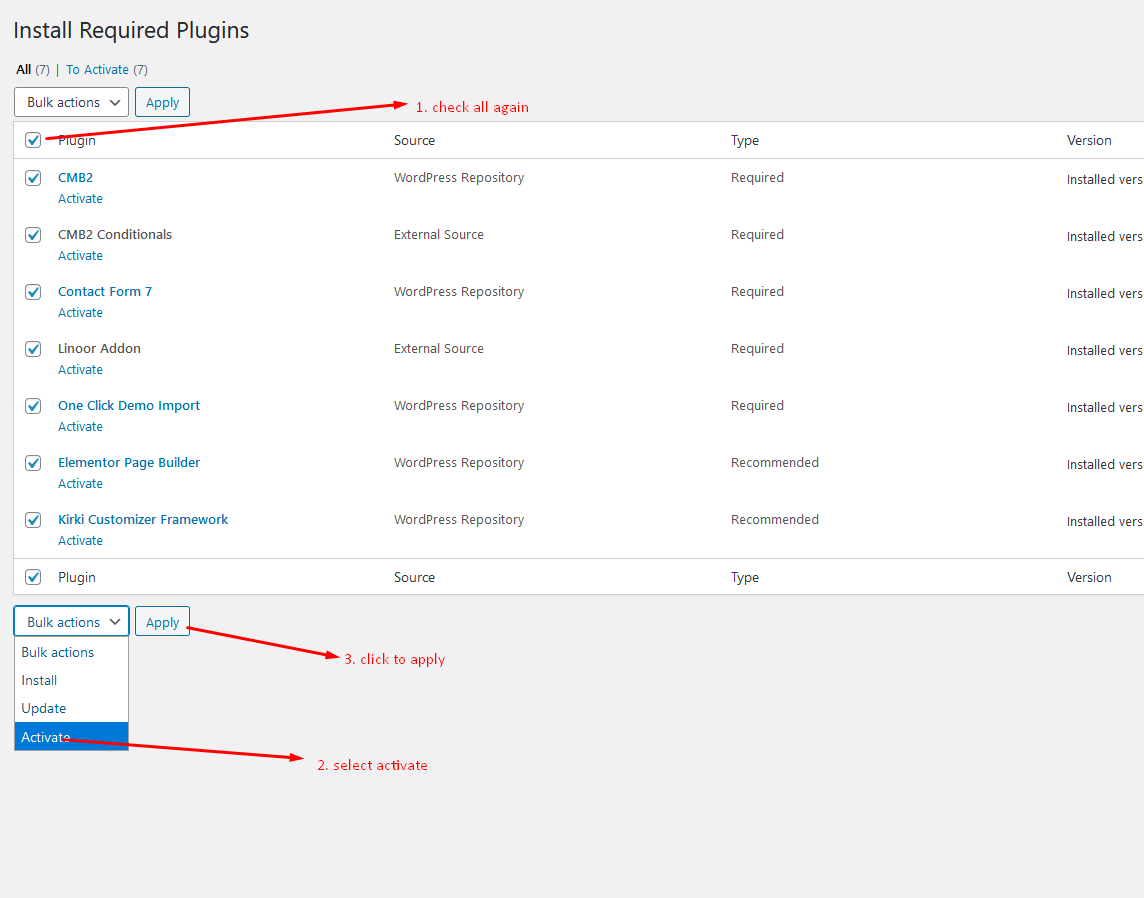
- Kirki Customizer Framework
- Elementor
- Contact Form 7
- CMB2
- One Click Demo Import
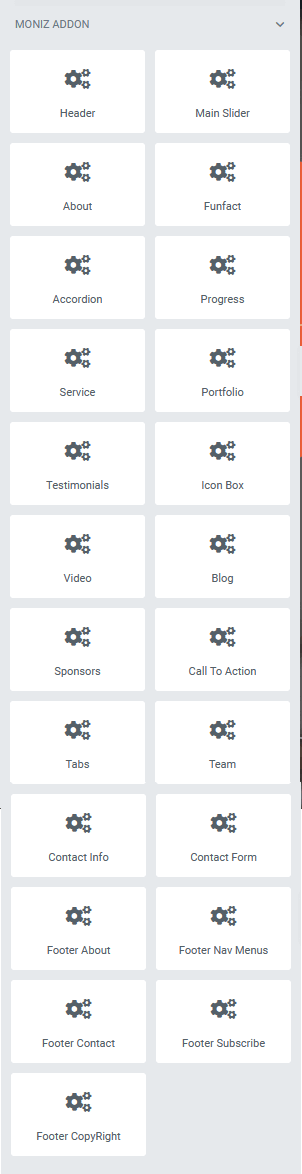
- Alipes Addon
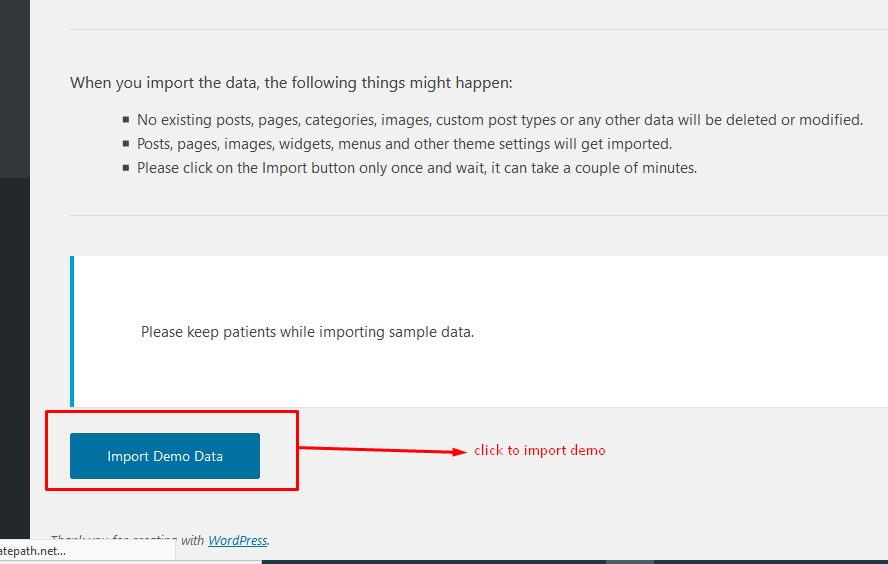
Demo Import
Once all plugin installed and activated correctly then you can do demo import see screenshot below. After few moment your site will look like our demo.
Video Walkthrough: Watch Below
Theme Options
We have used customizer for theme options
there is several section of options
Elementor
For drag and drop editing we have used elementor addons. With good customization options
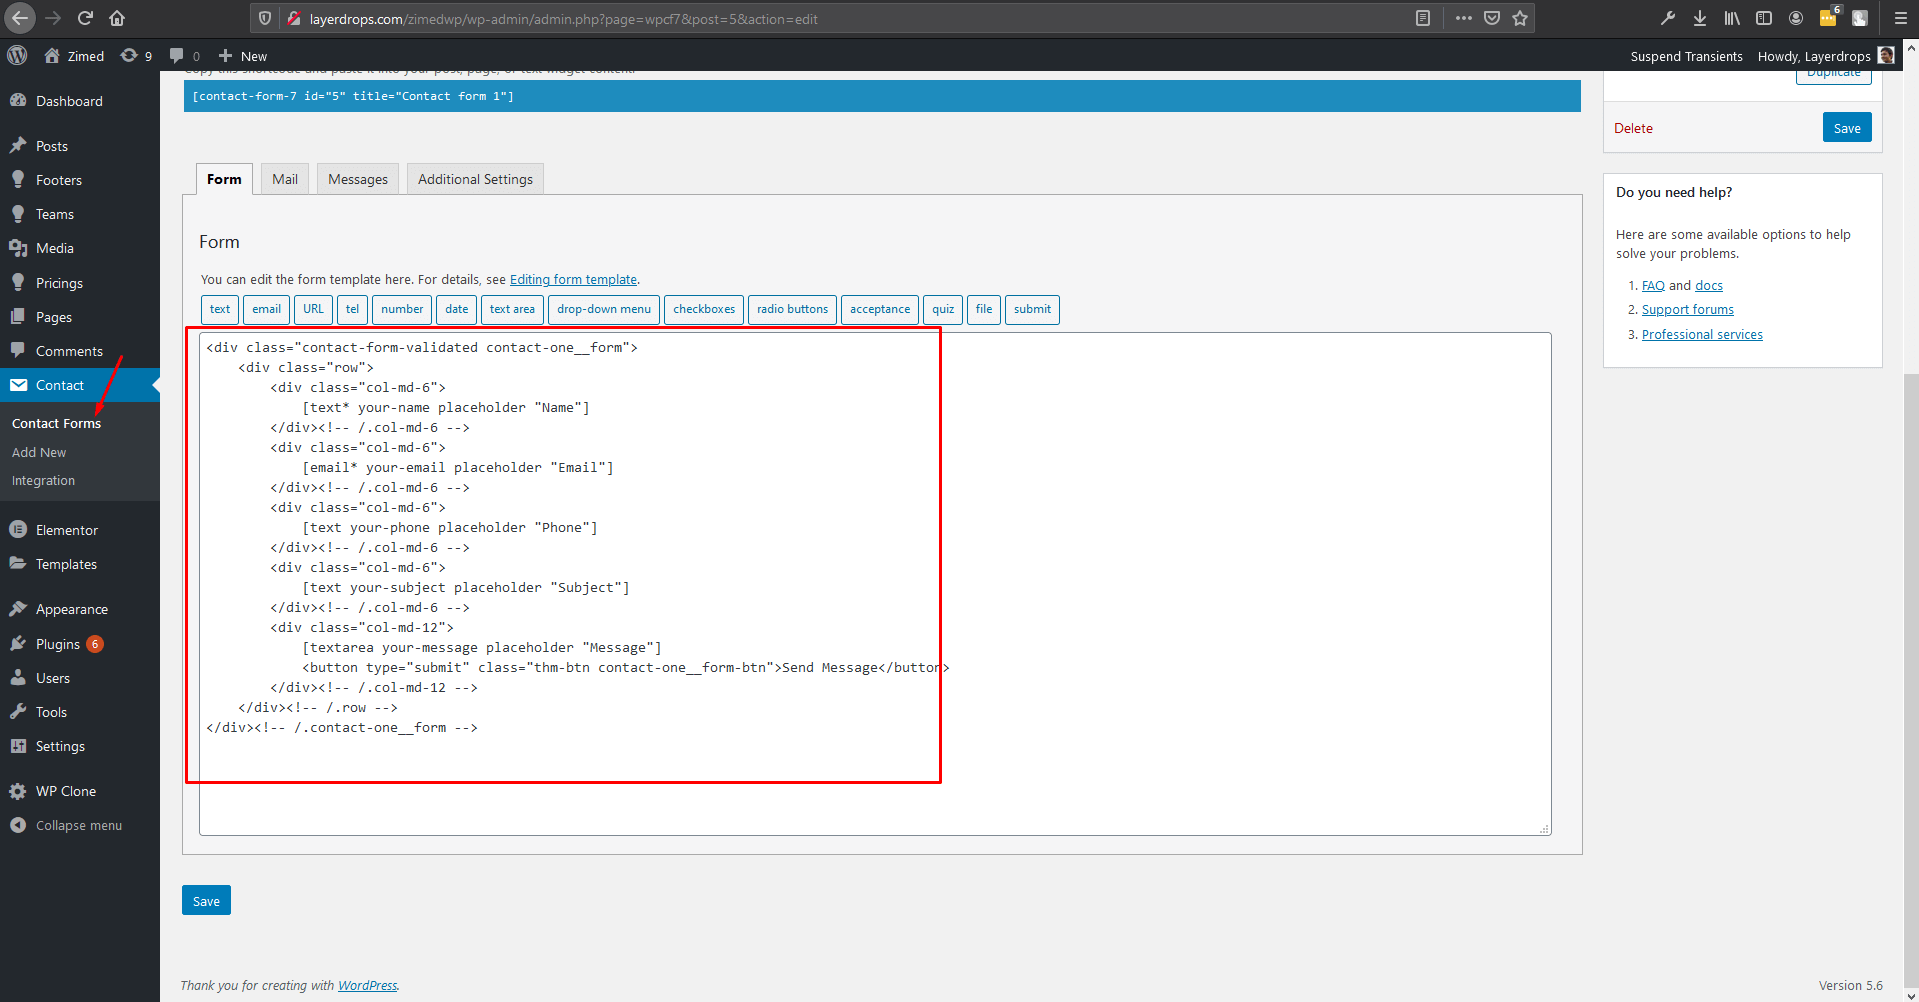
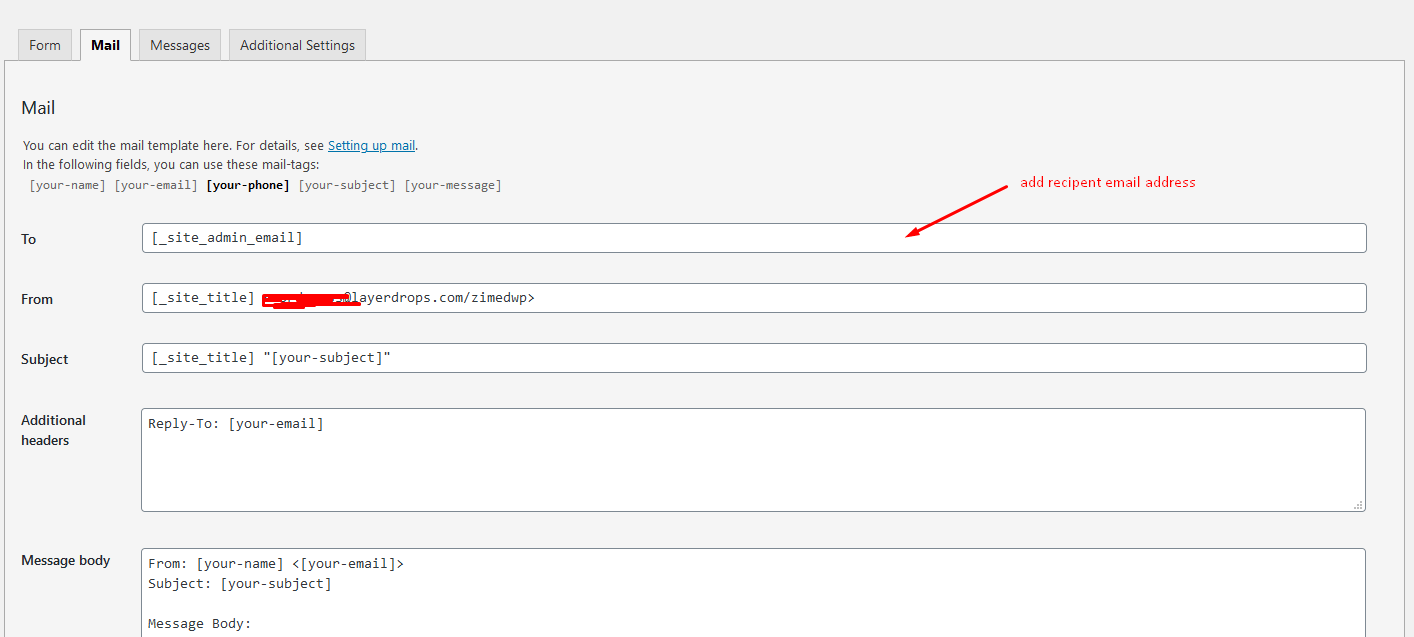
Contact form settings
For contact form we have used contact form 7 plugin
with this plugin you can easily get email from your visitor. To setup a contact form go to Contact>Add New after that you have to add necessary field and email settings to get the job done. In our theme demo we preloaded a contact form with necessary field and settings with that you can easily do your site. Here is a screenshot of it
MailChimp settings
First you have to get your mailchimp form url. To get that follow step below.
Finding your MailChimp form URL is pretty easy. You can follow the steps below and if you run into any issues let us know.
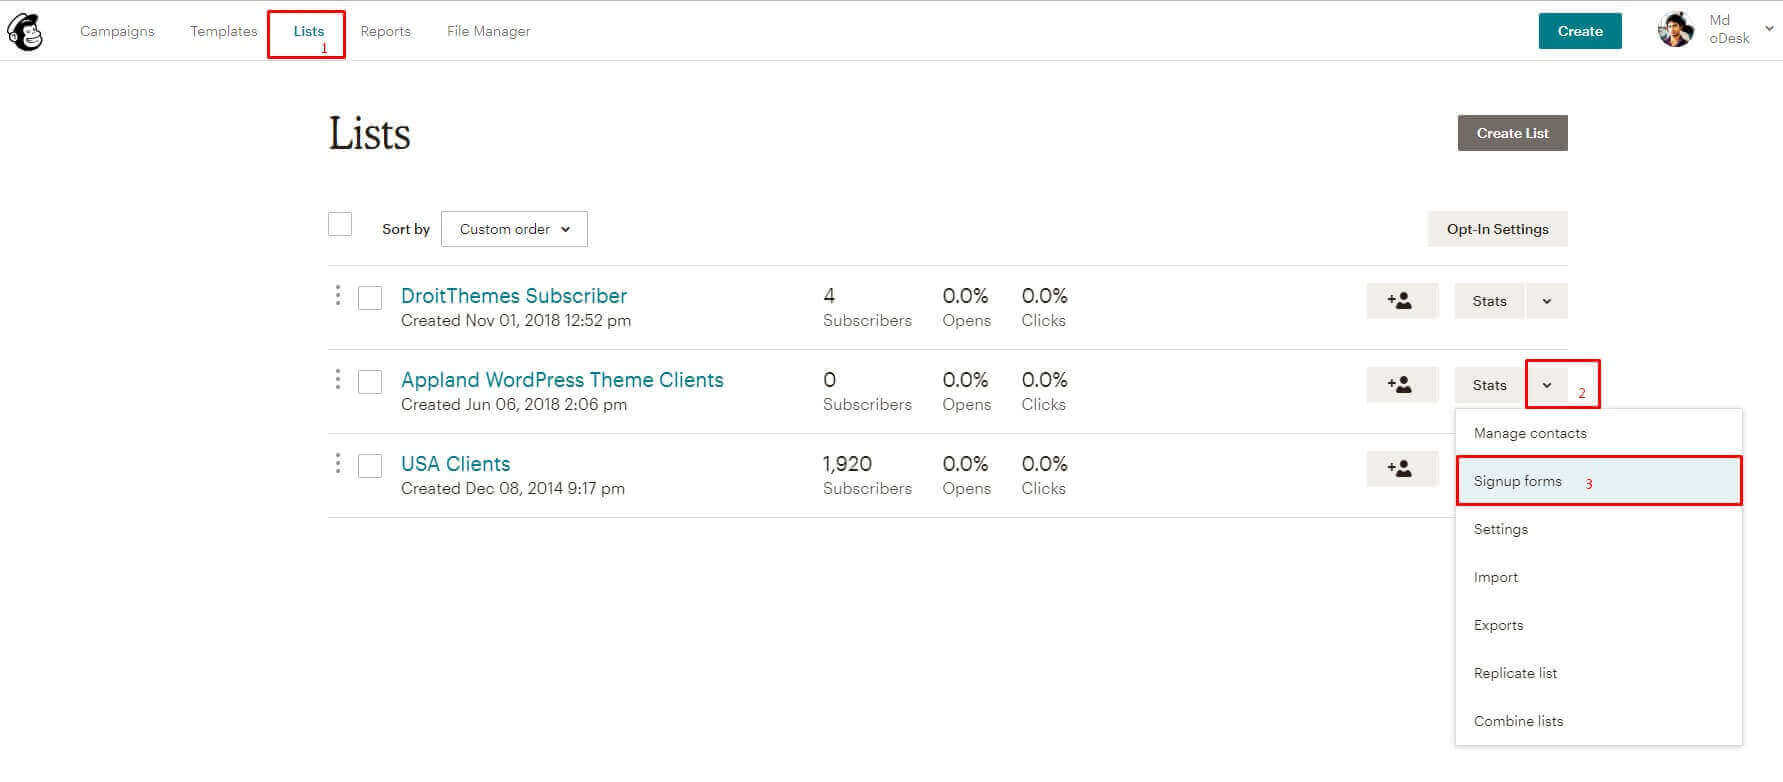
1. Log into your MailChimp account and click on the List from the top menu. Create a mailing
list for the people to sign up for if you haven’t already.
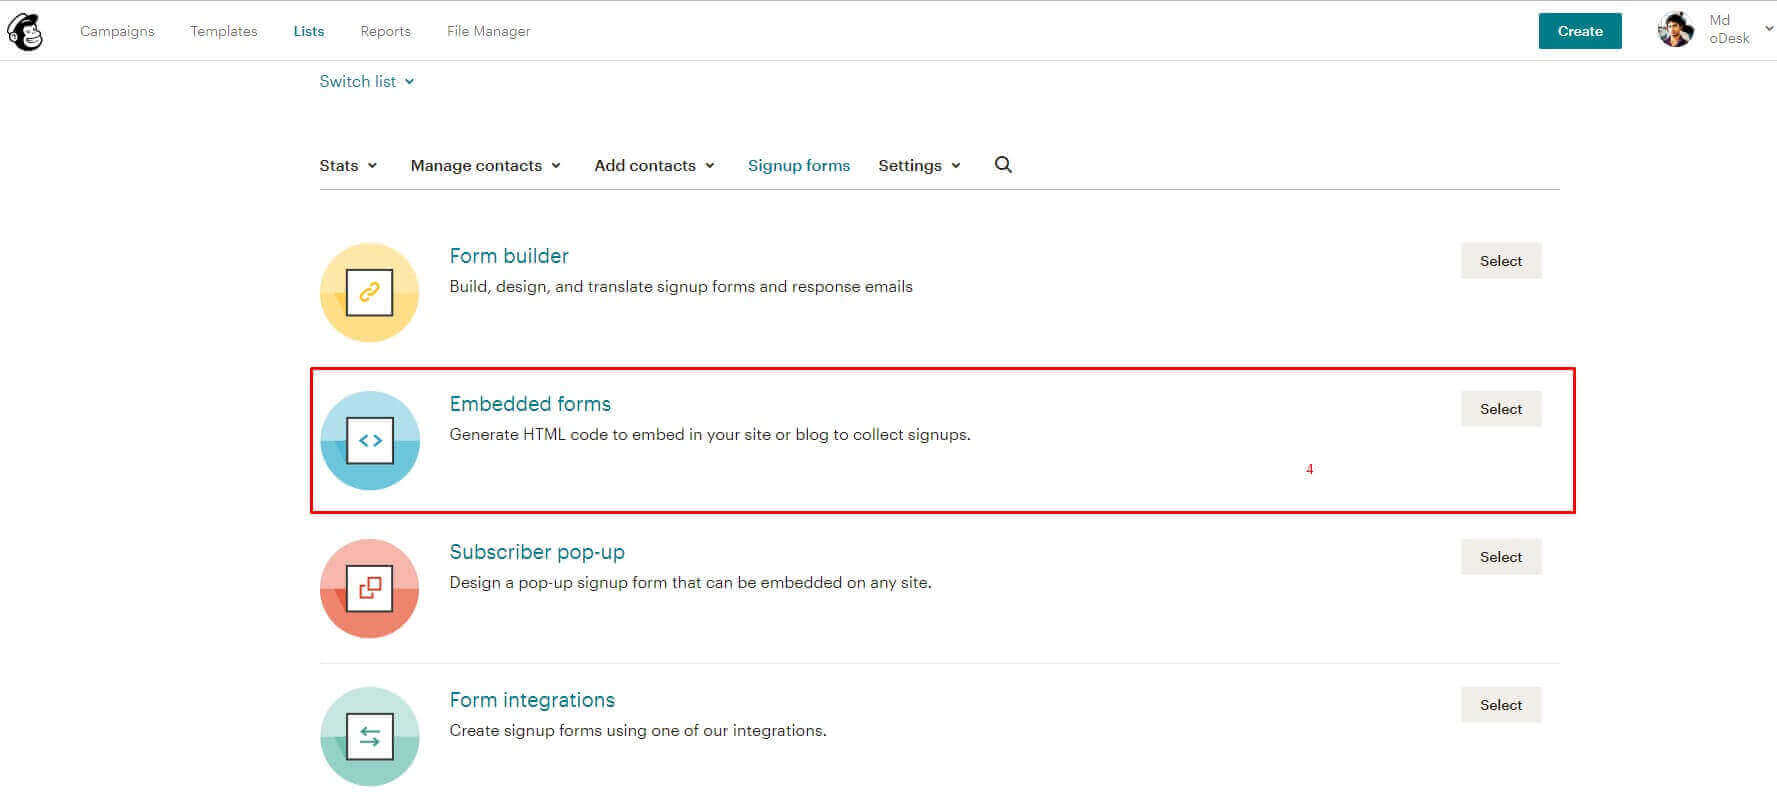
2. Click on the right down arrow (along with the Stats) of your selected List to see options
dropdown.
3. Click on the Signup forms option from the dropdown.
4. Click on the Embedded forms link from the list of form types.
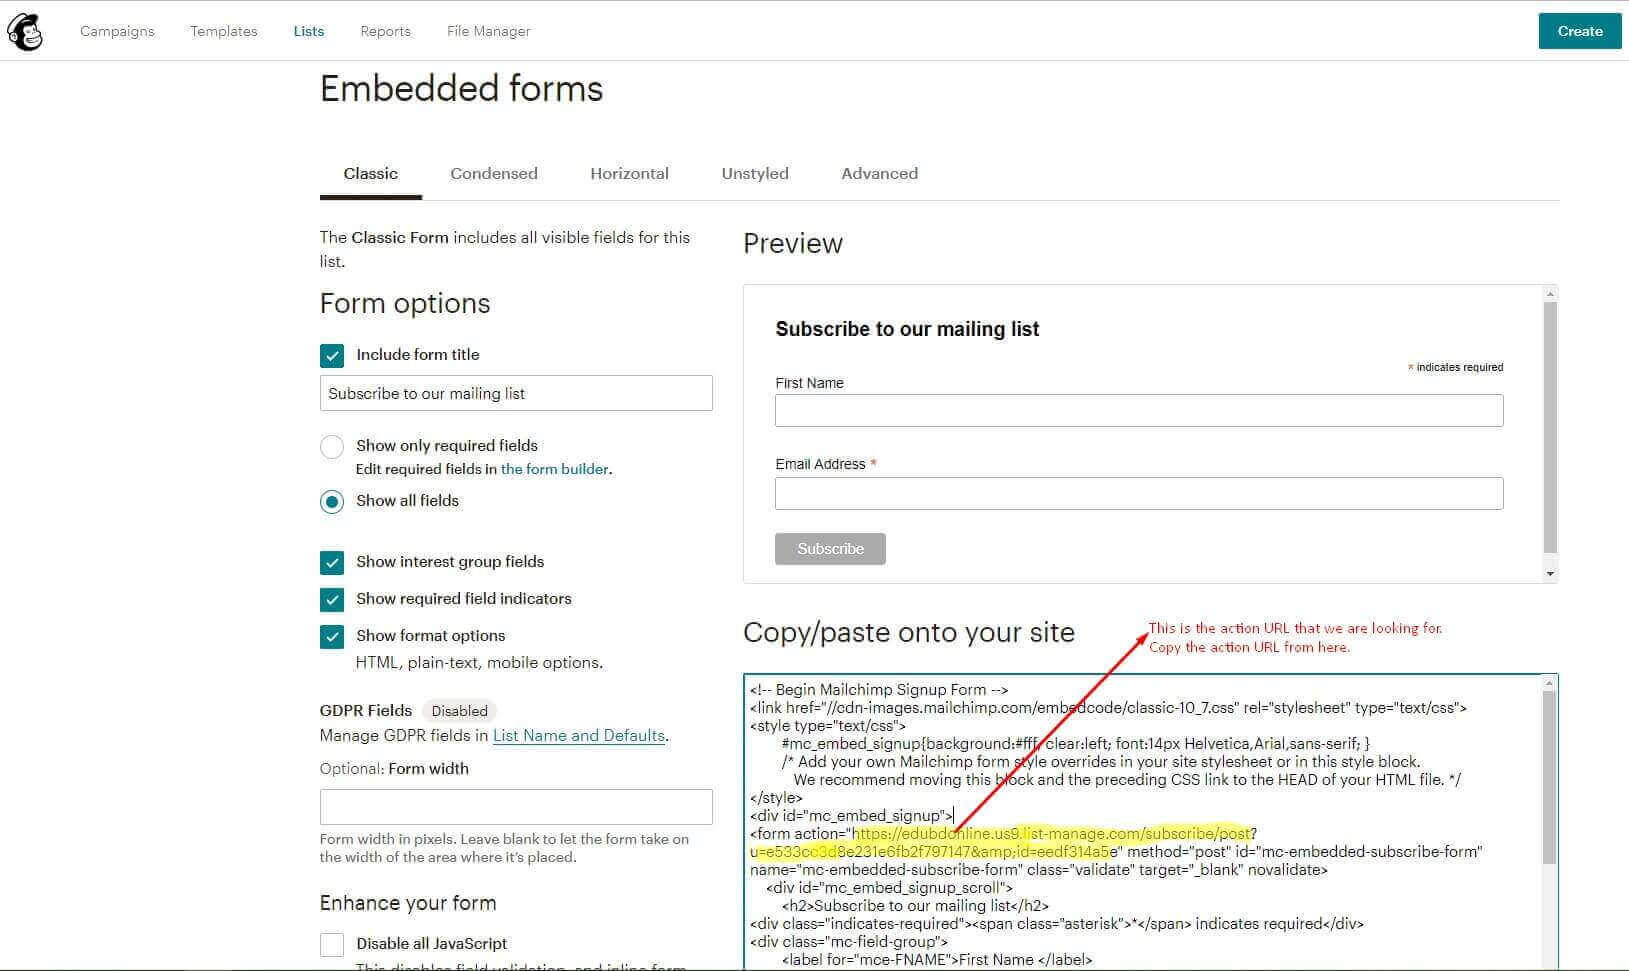
5. Then the Embedded Form code will appear. Look for the action keyword in the form code. This is the Action URL that you are looking for. Copy the action URL from there. Take a look at the screenshot below.
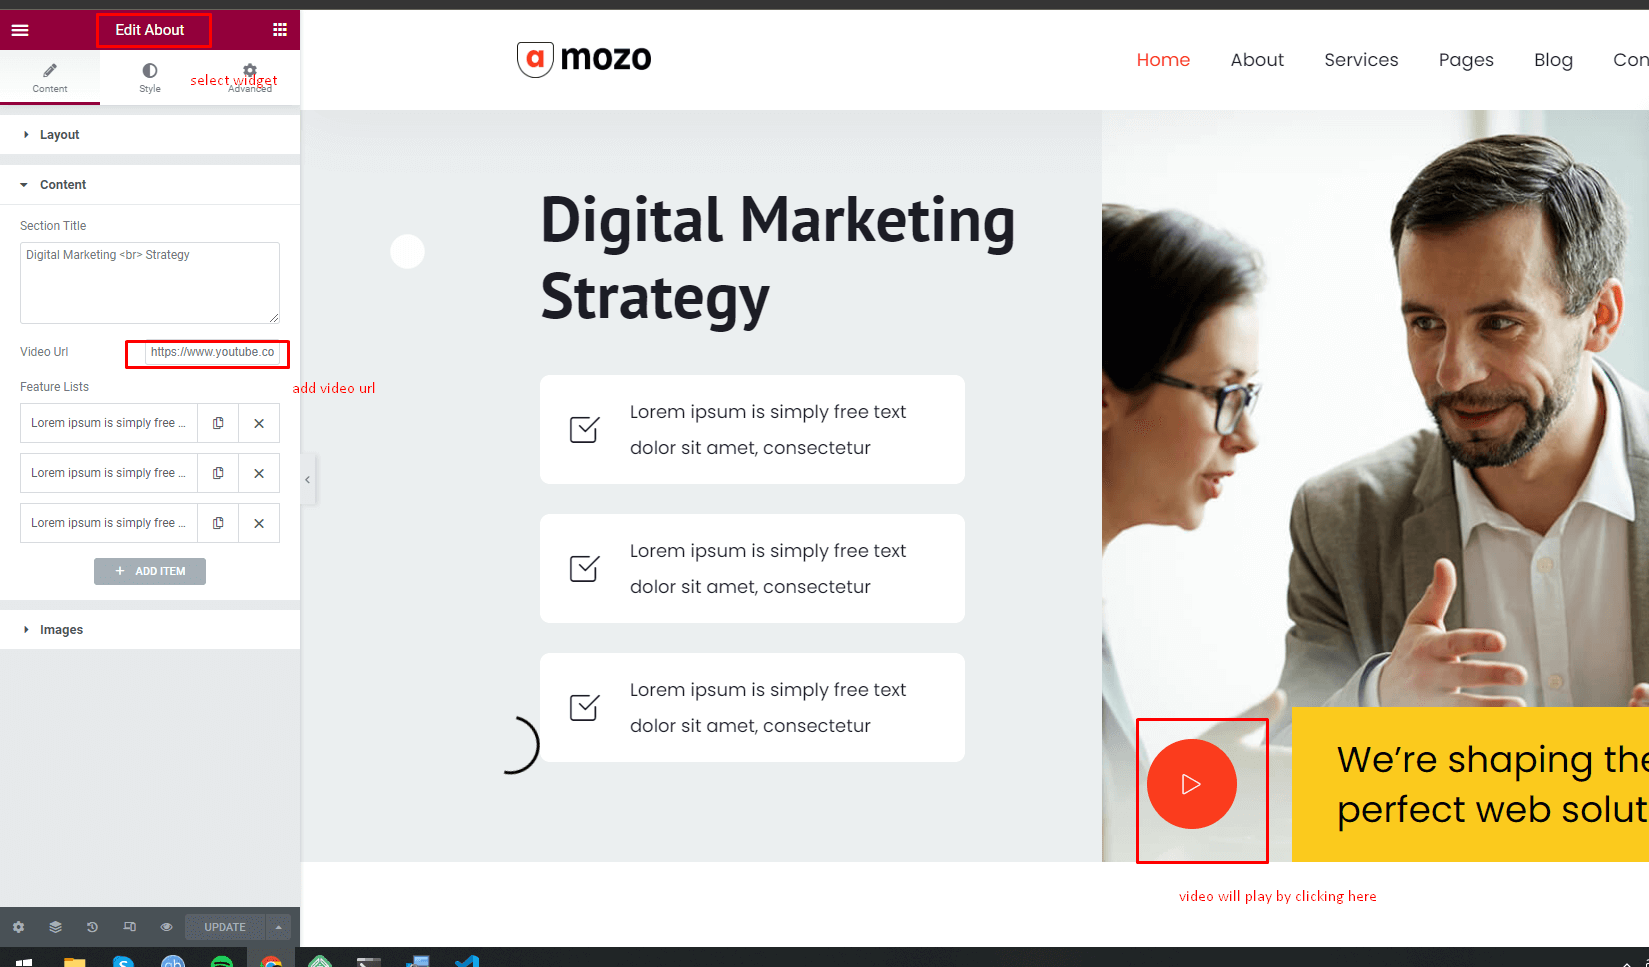
After getting your url you have to add it to our elementor widget
Video Popup settings
Basically we gave support of youtube video embeed on popup. For adding a video in popup you just have to copy the video url and paste it to our desier elementor widget see screenshot below.
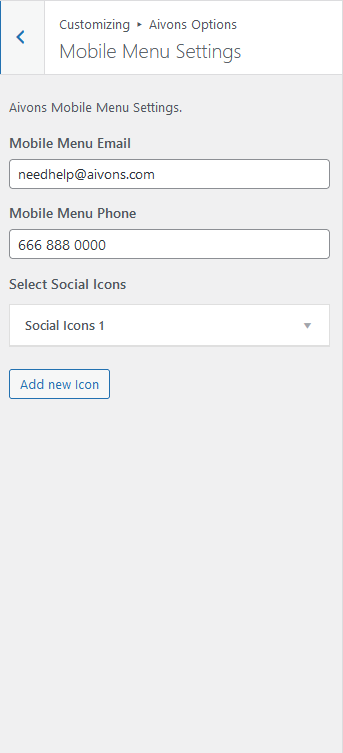
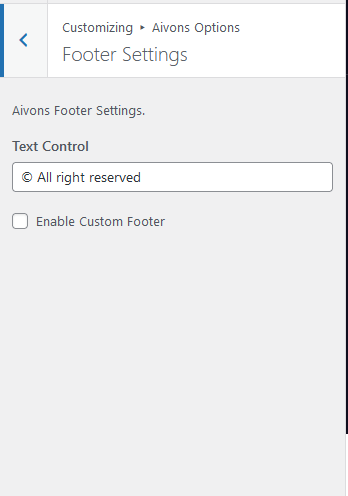
Footer customization
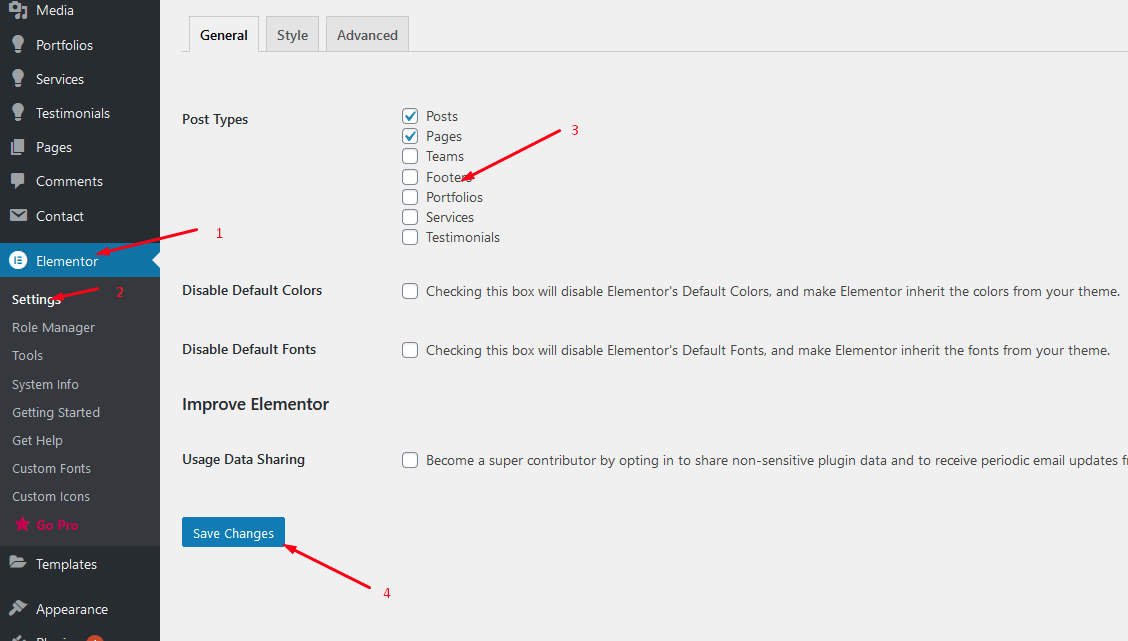
We have used custom post and elementor to build footer for our theme. After installing theme and setting up all plugins you will see Footer Post type will be available.
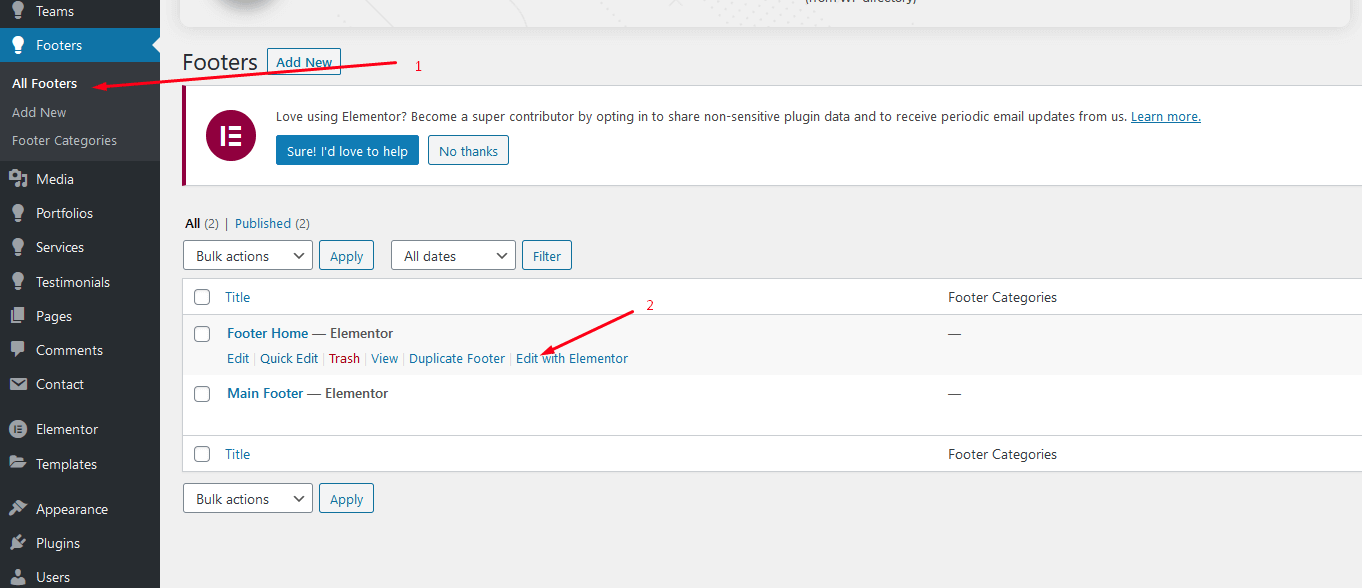
After that you have to go to Elementor > Settings then save footer post types to edit with elementor (screenshot 1)
Then for updating footer you have to go Footers> All Footers then if you want to update home page footer then edit Footer home with elementor or if you want to update inner pages footer then you have to update Main footer with elementor (screenshot 2)
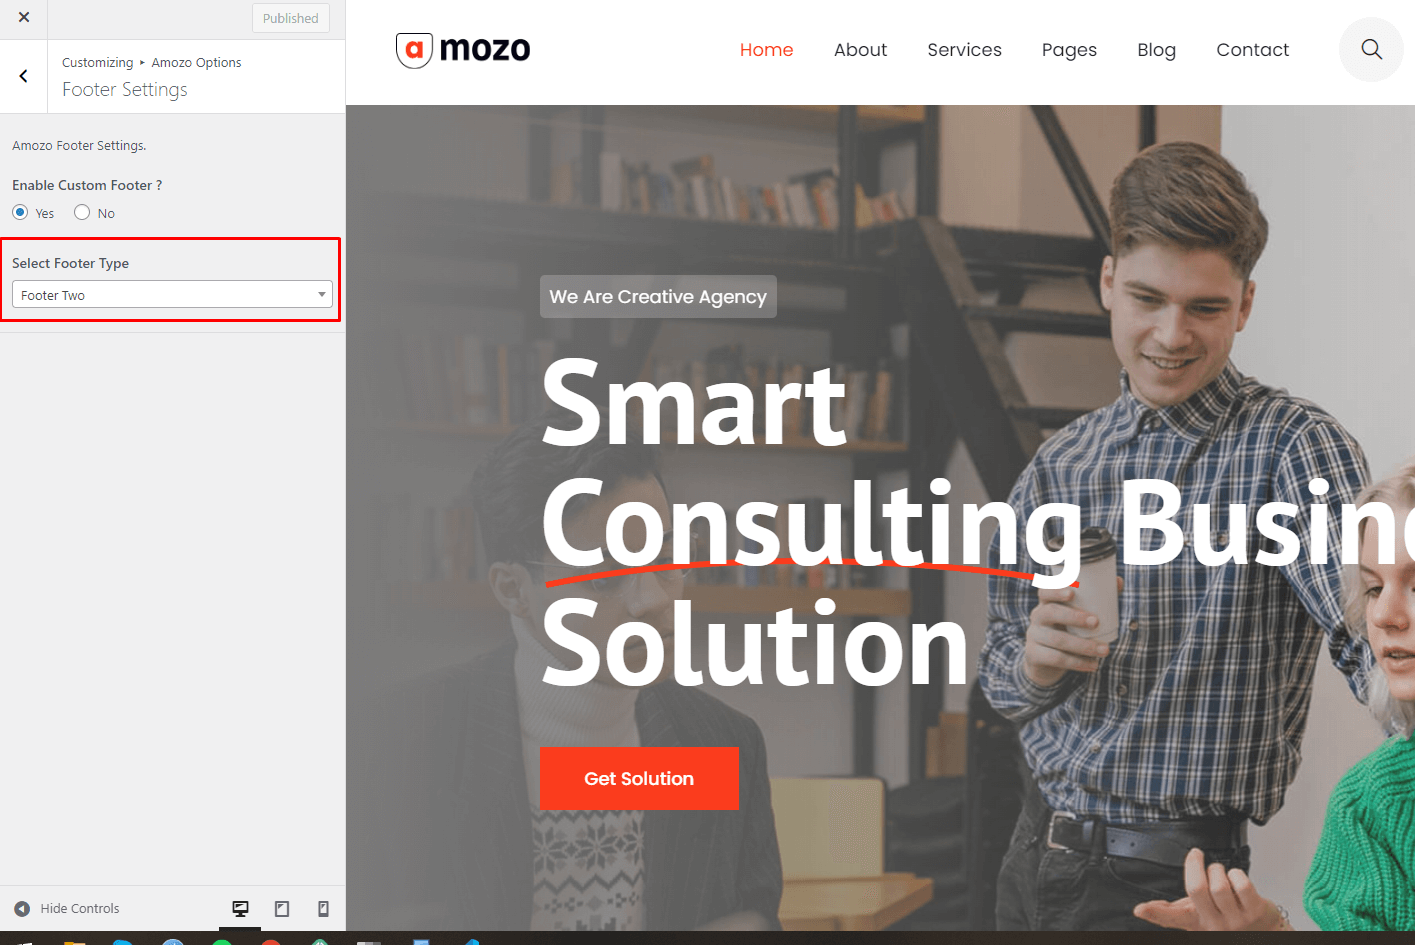
After creating a footer you have to select global footer from Customizer>Alipes Options>Alipes Footer Options> Select footer type see screenshot below.
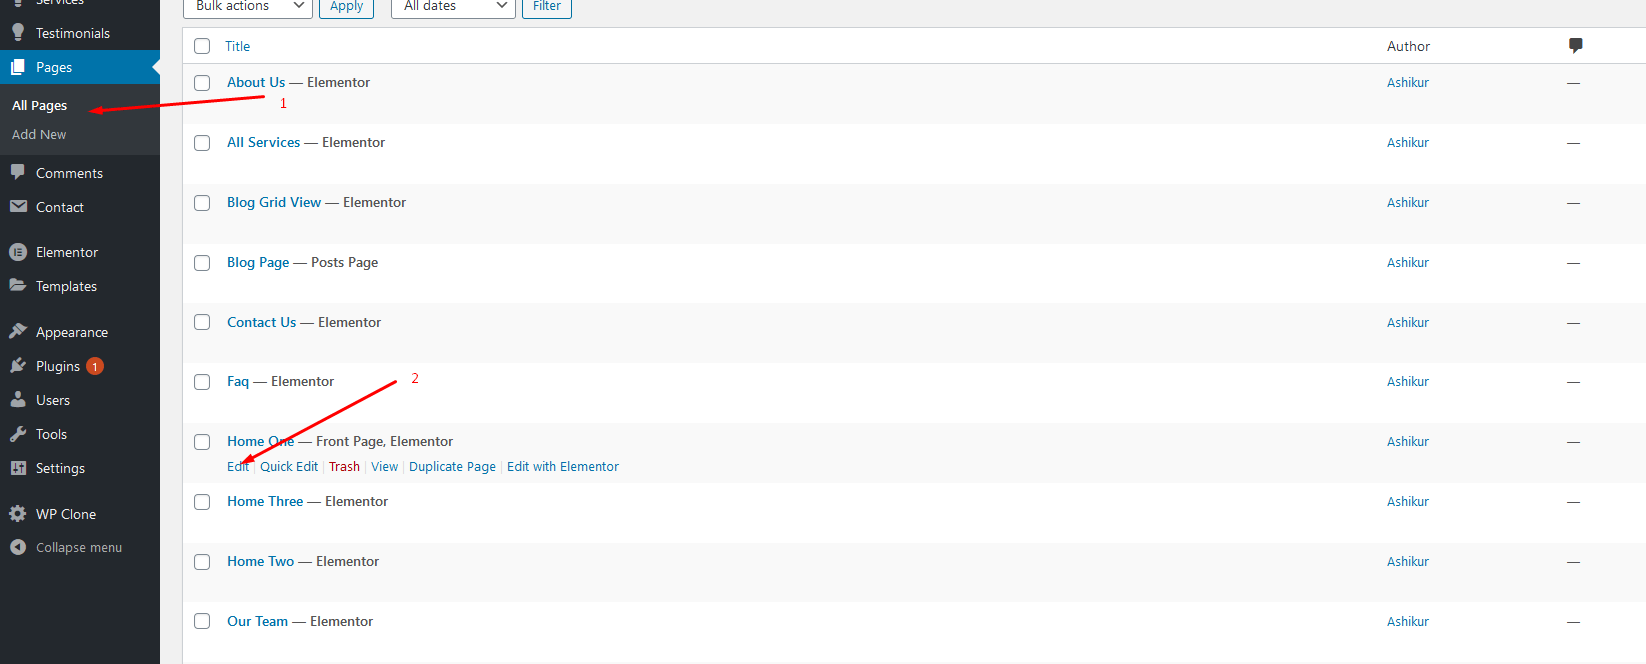
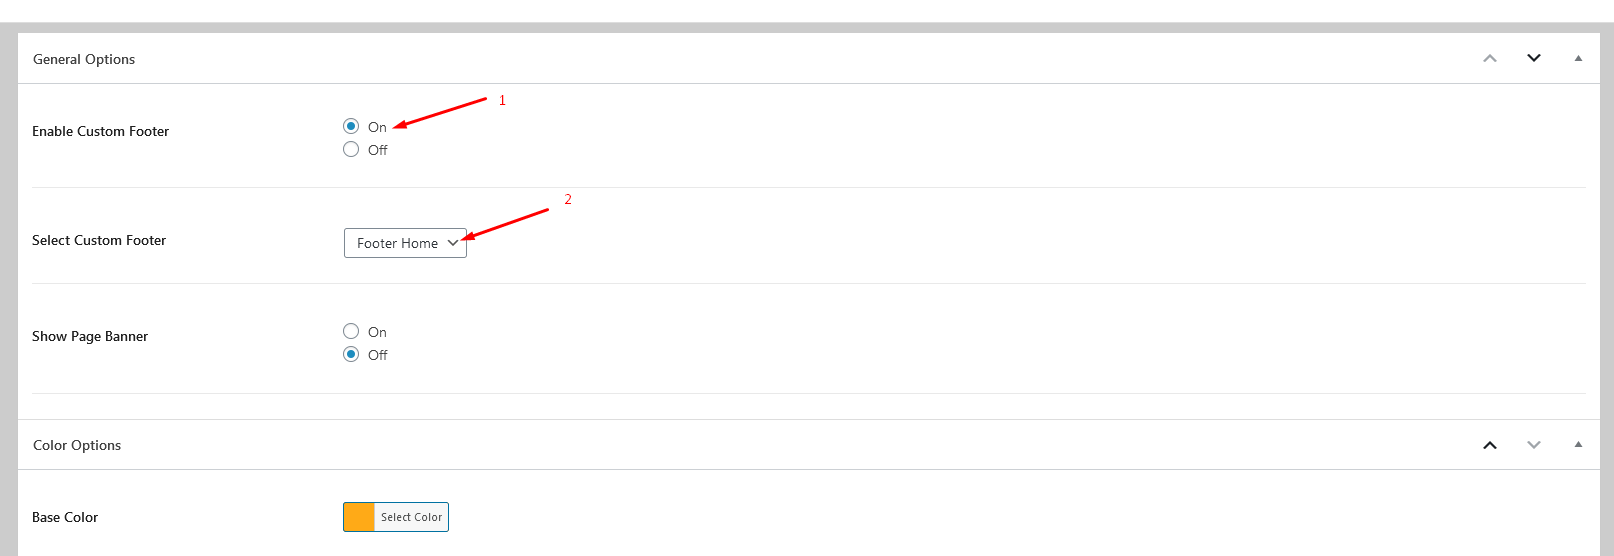
We gave options to set different footer on each page via metaboxes go to All pages> Edit Pages> General Options> Enable Custom footer and select desire footer see screenshot below.
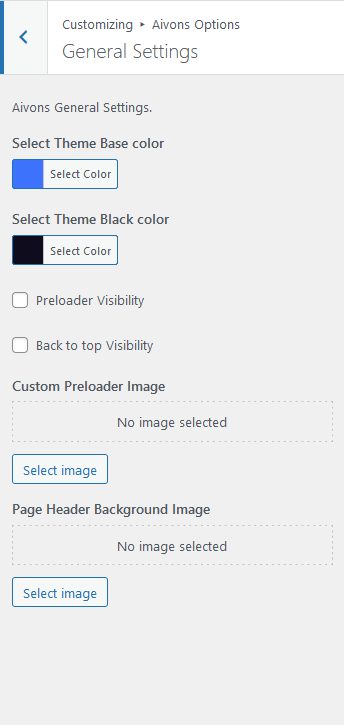
Colour Options Settings
We gave 2 way colour options to our theme. One is via Theme options (AKA Customizer). Another is Page Metabox. Because In different page colour should be different for design needs.
our theme colour option work in a different way. If there is anything set in page meta box it will take effect first and if there is no value is in page meta box then it will take effect via customizer options. After there is last condition if there is nothing set on customizer options it will take theme default. Another thing is Customizer Options is a global color options. Page metabox Is only for pages.
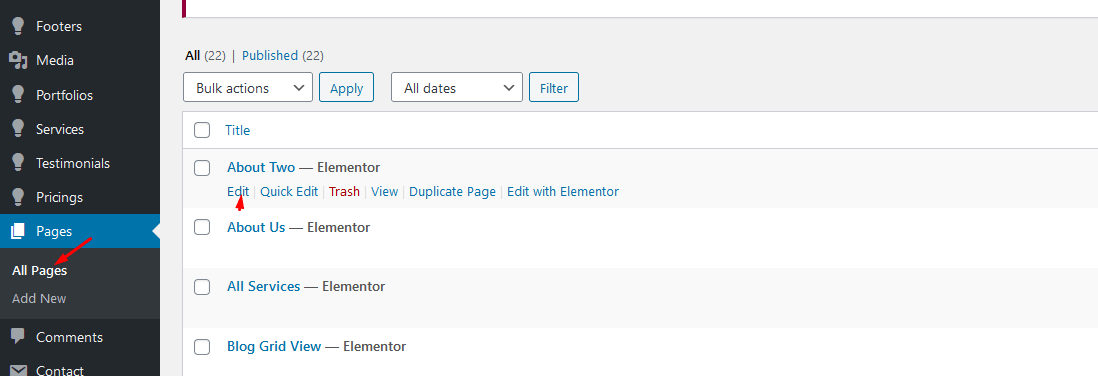
You can navigate to page meta box for colour options via Pages> Any of Page>Edit(not Edit with elementor)> Color Options(at bottom of edit screen). See Screenshots below.

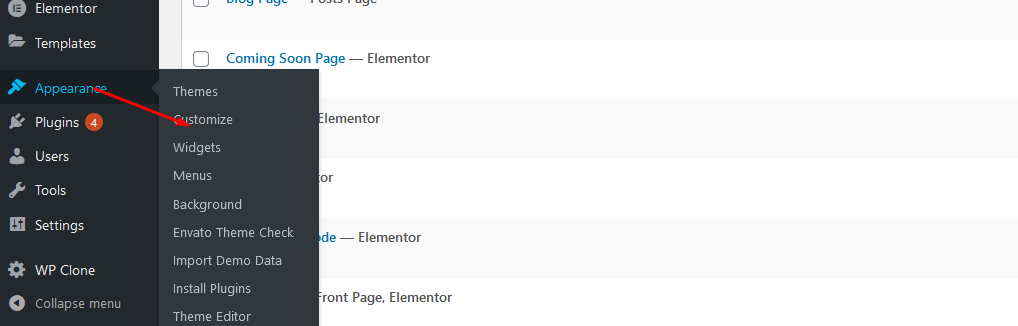
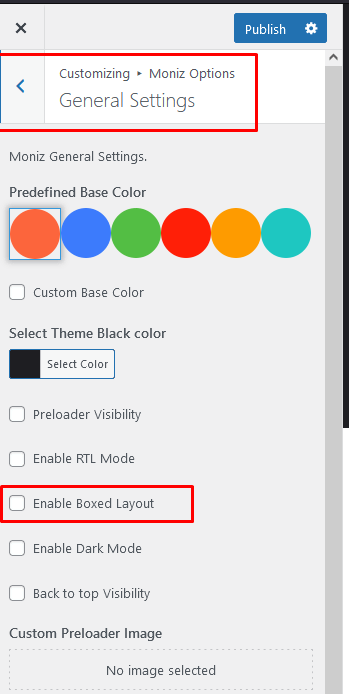
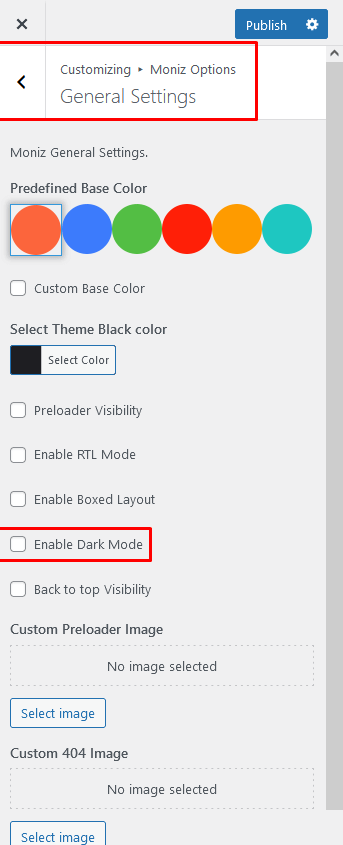
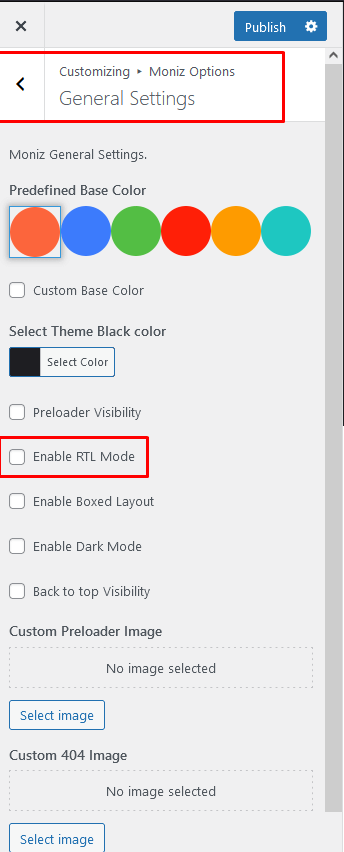
You can change colour via customizer. For that you have to go to Appearance>Customizer>Alipes Options>General Options. See screenshot below.

There is a special note for color update. For our theme design needs We have given some solid colored image via css. You have to update those Image by code. It will not work on color selections.
Video Walkthrough: Watch Below
Icon List
We have created select field with selected icons to related with design. From the links below you can get those icon list
Additionally we used fontawesome 5 free version so you can also use it easily to our related elementor widget see screenshot below
Support
Once again, thank you so much for purchasing this theme. As I said at the beginning, I'd be glad to help you if you have any questions relating to this theme. No guarantees, but I'll do my best to assist. If you have any queries, please feel free to contact us at Support Center.
Contact Us at : Ticksy Forum